How to Install and Run a VNC Server on Ubuntu Linux
Accessing a computer via remote desktop is an important part of work-life. Remote desktop programs allow you to access and control other systems that are not physically available to you. Work from home jobs have made remote computing even more relevant by allowing people from distant regions to work remotely using their computers.
This guide shows you have to install a Virtual Network Computing (VNC) Server on Ubuntu 20.04 LTS to make remote computing possible on your system.
What Is a VNC Server?
Traditionally, Linux computers access other systems via the terminal using utilities such as Secure Shell (SSH). However, the only challenge with the command line interface is that you can not interact with the other PC using a GUI. This is where a VNC connection comes in handy.
A Virtual Network Computing Server, commonly known as a VNC server is a system that allows you to remotely access and interact with another PC over a network using a graphical interface. Many VNC applications have been developed; some of them include TightVNC, TigerVNC, and RealVNC. In this guide, we will use the x11vnc server for setting up remote computing on our Ubuntu system.
X11vnc is a lightweight VNC server that does not create an extra display for the remote desktop. Instead, it shows the existing x11 display (KDE, GNOME, Xfce, etc.) of your Linux system in real-time. Another advantage with x11vnc is that you can use any VNC client or viewer to connect to it.
The x11vnc server has built-in SSL/TLS encryption and 2048 bit RSA authentication, including VeNCrypt support along with the UNIX account and password login system.
Installing a Compatible Display Manager
Ubuntu Linux uses the GNOME Desktop Manager (GDM) as the default display manager. Newer versions of Ubuntu use gdm3. Unfortunately, GDM does not usually work very well with the x11vnc server. To overcome this, you will have to install the Light Display Manager, or lightdm.
Open the terminal using the Ctrl + Alt + T keyboard shortcut. First, update your software sources using apt.
sudo apt updateThen, install lightdm using the below-mentioned command:
sudo apt install lightdmThe following screen will appear during the installation process. Press the Enter key on your keyboard to continue.
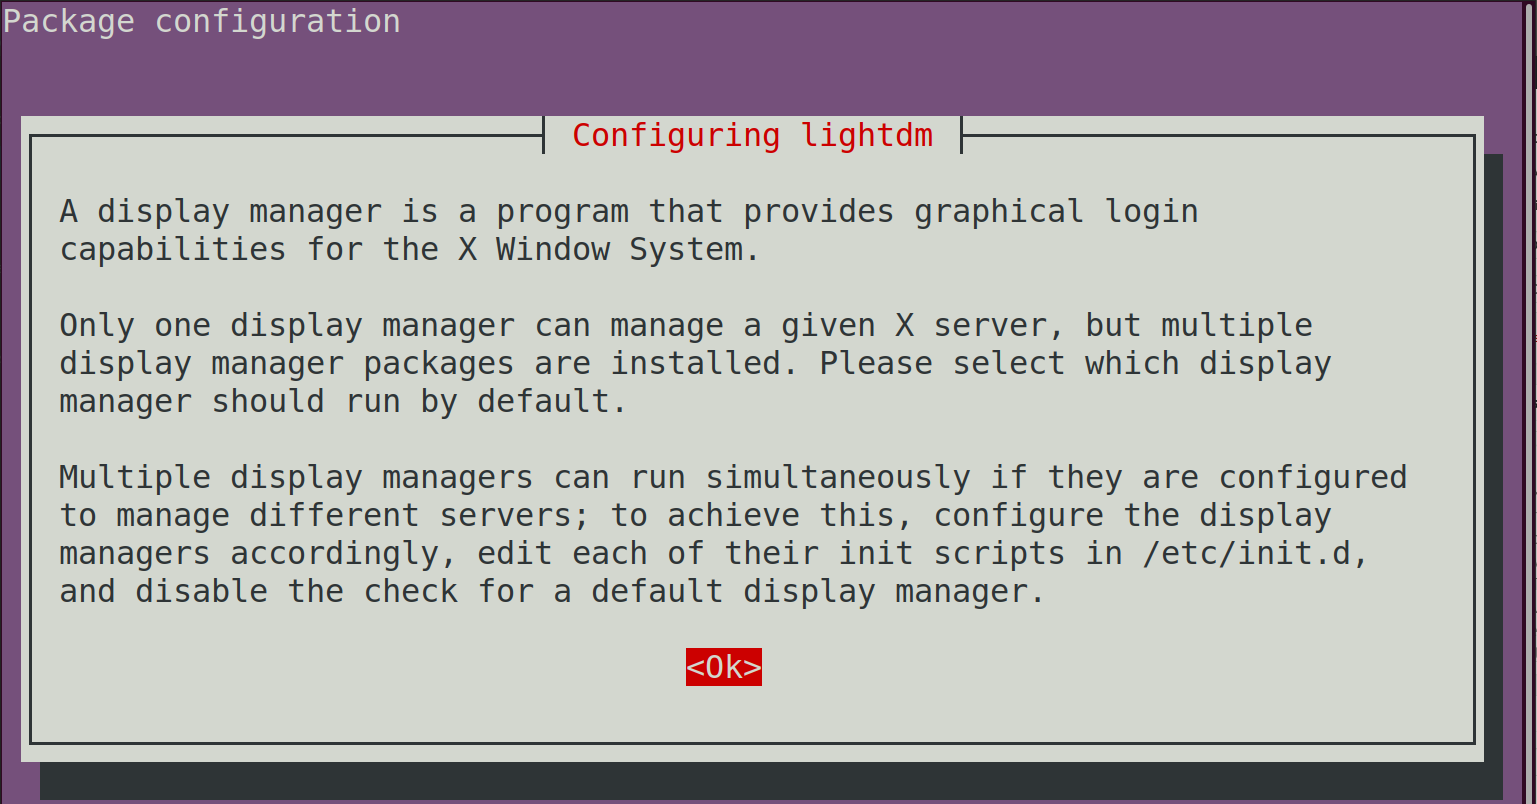
Next, select the lightdm option and press Enter on your keyboard.

Reboot your PC for the display manager changes to take effect.
sudo rebootYou will notice a slight change in the login screen after the reboot because you are now using lightdm as your display manager.
Installing x11vnc Server on Ubuntu
To install the x11nvc server, open your system terminal by pressing Ctrl + Alt + T. Then, run the following command.
sudo apt install x11vncConfiguring the x11vnc Server
You will now configure a service used for starting the x11nvc server. Create a file named x11nvc.service in the /lib/systemd/system/ directory. This guide uses Vim but you can use any other Linux text editor of your choice e.g. nano.
sudo vim /lib/systemd/system/x11vnc.serviceCopy and paste the content below into the newly created service file.
[Unit] Description=x11vnc service
After=display-manager.service
network.target syslog.target
[Service]
Type=simple
ExecStart=/usr/bin/x11vnc -forever -display :0 -auth guess -passwd randompassword
ExecStop=/usr/bin/killall x11vnc
Restart=on-failure
[Install]
WantedBy=multi-user.target
The text randompassword is the password that you will use for logging in to your server. Edit it and set it to your preferred strong password.
Simply put, the text in the service file states that: this is a child service and the system should start this service after all the other services have started. In case of a failure, the service should restart itself before the process reaches the multi-user target.
If you are using Vim, press the Esc key. Then, type :wq followed by the Enter key to save changes and quit the Vim editor.
After saving the file, make sure to reload the systemd manager configuration and unit files.
systemctl daemon-reloadThen, enable the x11vnc service.
systemctl enable x11vnc.service Finally, start the VNC server using the command below.
sudo systemctl start x11vnc.service Check the status of the x11vnc service using systemctl.
systemctl status x11vnc.serviceThe output should be similar to the one shown below.
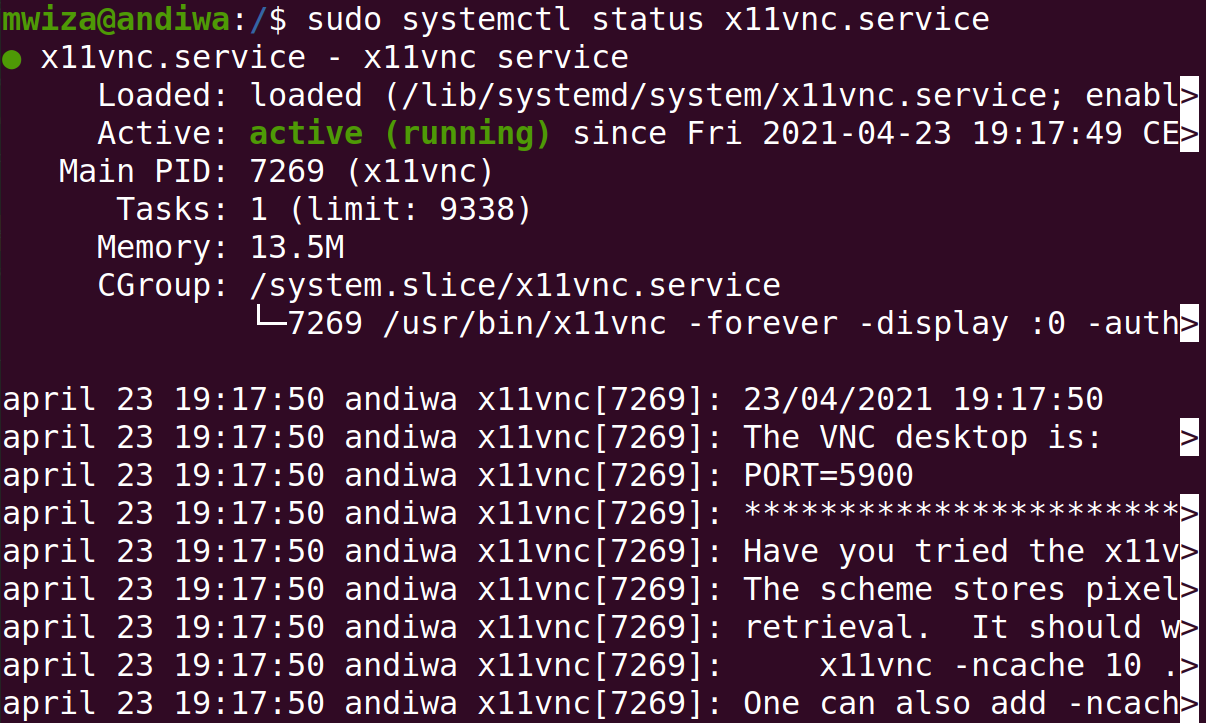
As you can see from the output above, the service is active and running.
Another important thing to note is the port that the x11vnc server is using (in this case, port 5900).
Enabling the Server Port in Your Firewall
Ubuntu uses the ufw firewall by default. To enable other PCs access the Ubuntu system via the port used by the x11vnc server, issue the following command.
sudo ufw allow 5900/tcpConnecting From Another Computer
You can now connect to your Ubuntu system via remote desktop connection using VNC.
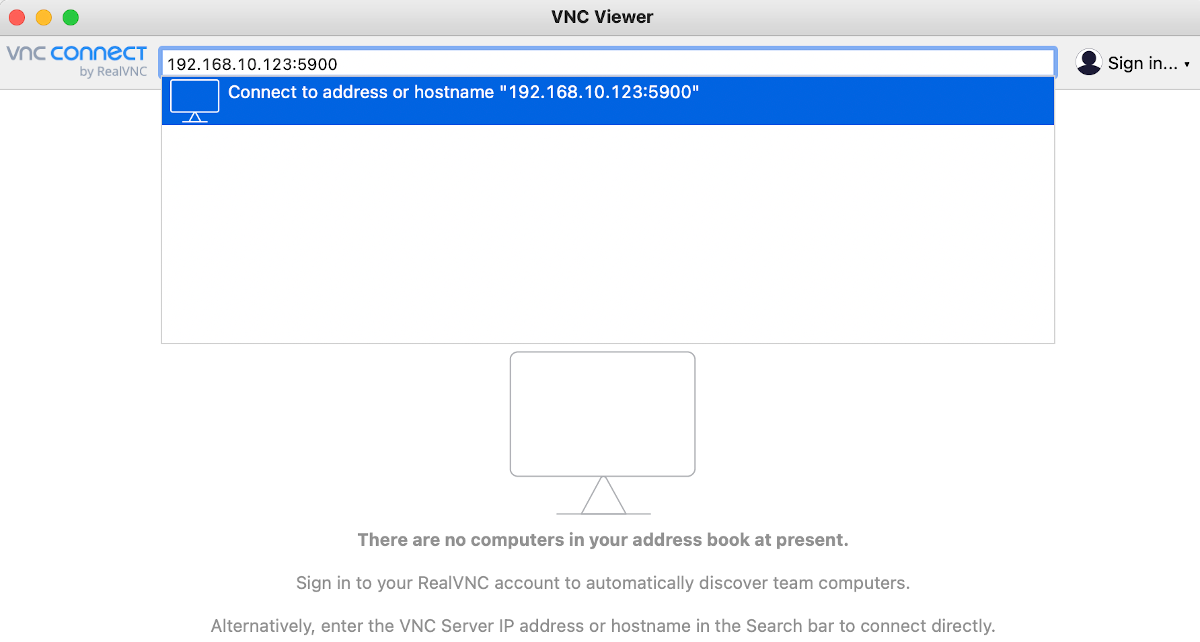
You can use any VNC client to connect to the Ubuntu Linux PC. One of the recommended VNC viewers is VNC Connect by RealVNC. It is available for almost every major platform including macOS, Linux, Windows, iOS, Android, etc.
Download: VNC Viewer by RealVNC
After downloading the VNC client, install it on your system and launch the application.
This guide uses the macOS installation of VNC Connect but the process would be similar for other operating systems as well.
Enter the IP address of the PC you want to connect to, followed by the port number used by the x11vnc server. Then, press the Enter key on your keyboard to connect.
Note: In Ubuntu, you can get your IP address by typing the command below.
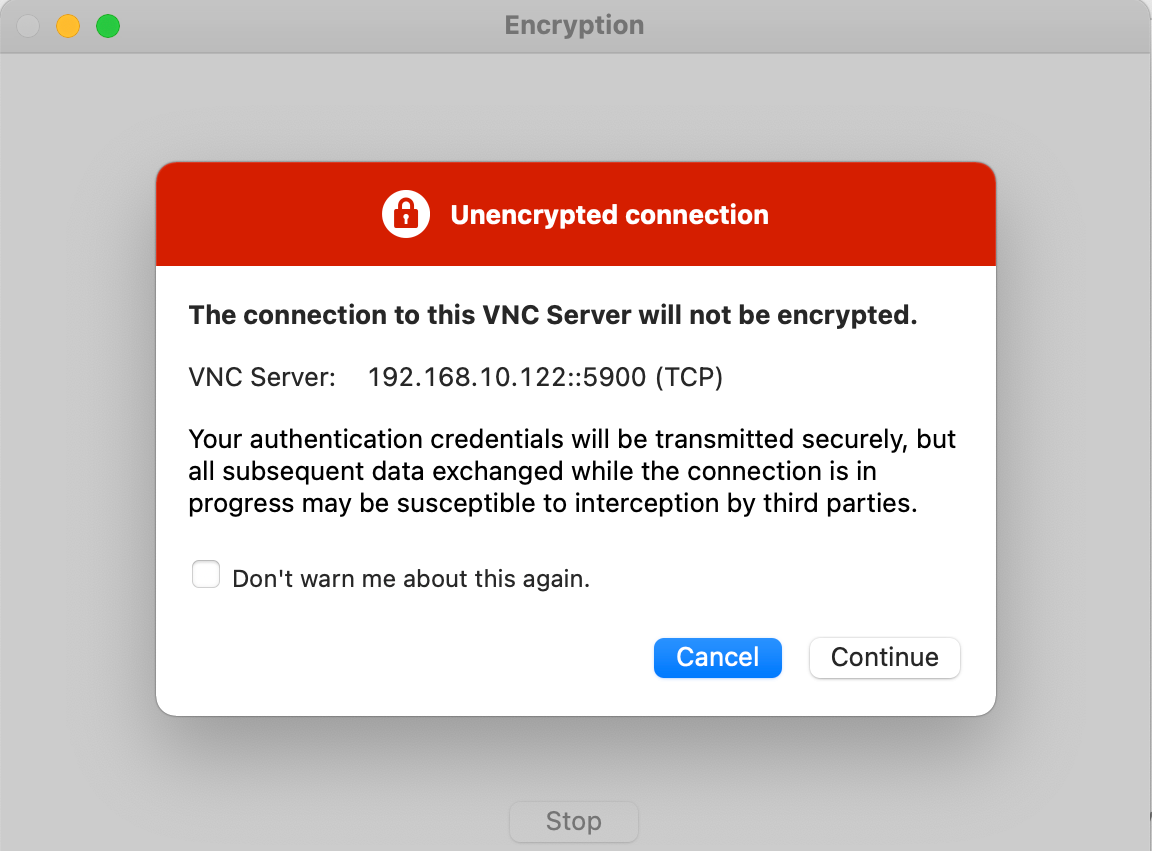
ip addrThe VNC connection will not be encrypted, meaning that anyone who eavesdrops on the network can access the data and view it easily. The password, however, is encrypted. The VNC client will warn you about the unencrypted connection. Select the Continue button to proceed.
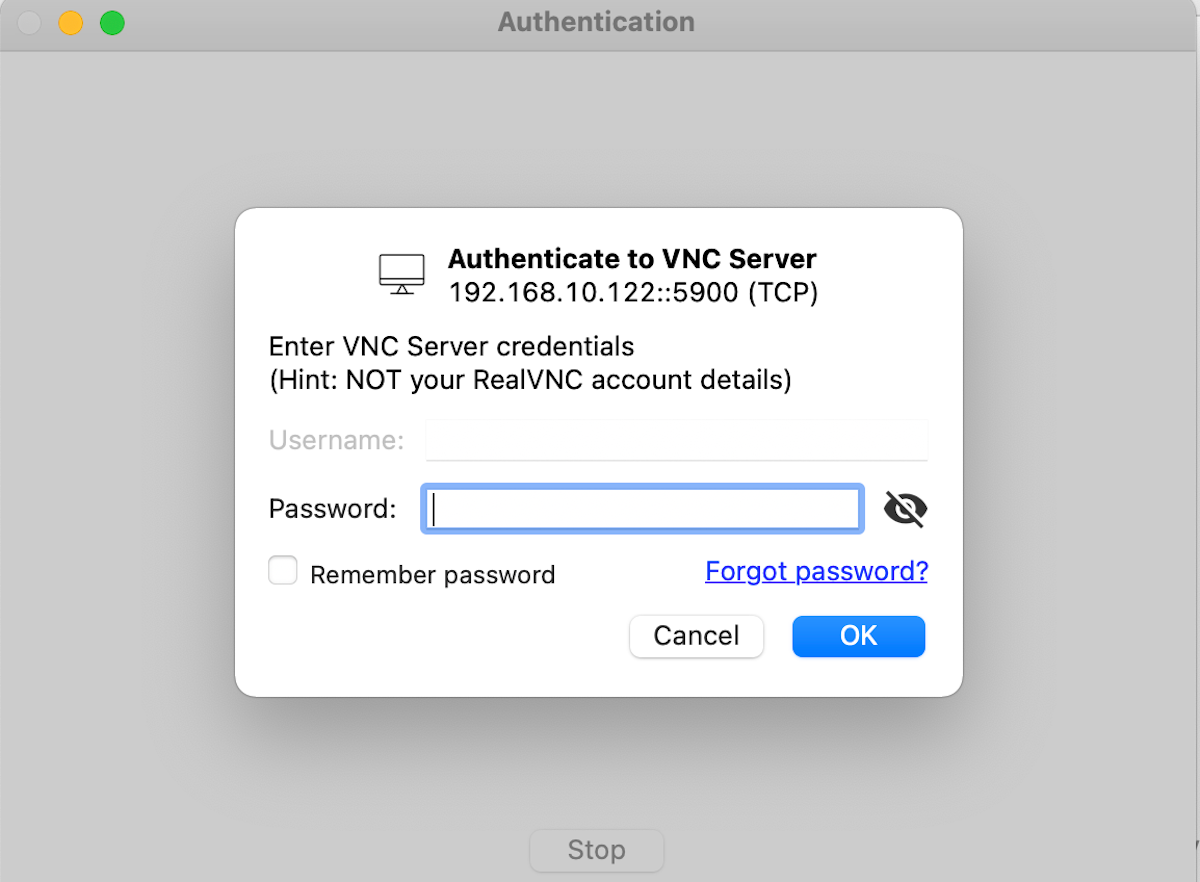
On the next screen, you will be asked to enter a password, which is the password you set in the x11vnc.service file above. Enter the password accordingly and hit the Ok button to continue.
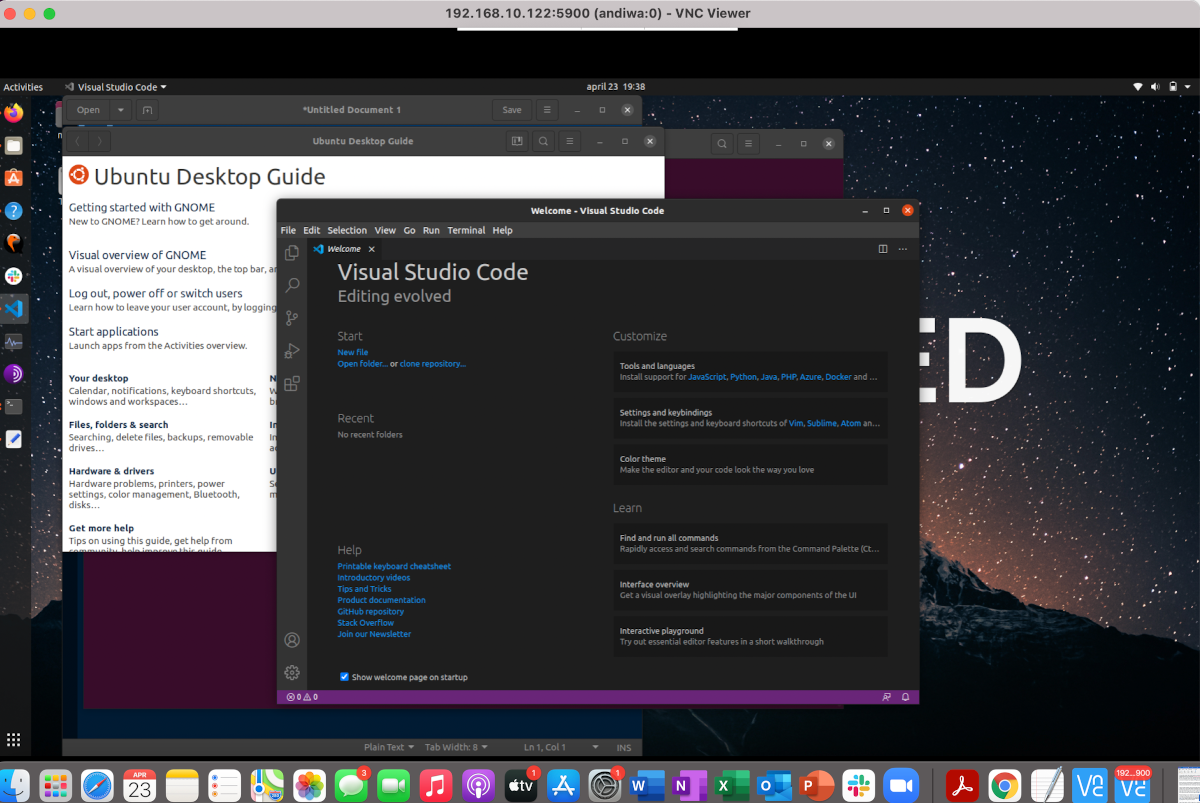
You will now be able to access your PC from another device.
Disabling Screen Locking
One of the problems faced while using the x11vnc server is screen locking. However, you can easily fix this issue by disabling the screen lock on your PC.
Head over to Settings > Privacy > Screen Lock and make sure you disable the Automatic Screen Lock and Lock Screen on Suspend options.
Note: This is a potential security risk, so be sure to enable it again later.
Working Remotely on Your Linux Machine
Remote desktop programs are an important part of your life if you're working remotely. Even if you have a VNC server set up on your system, you won't be able to access the system without a VNC client. With a VNC server installed on your Linux PC, you can access your system from other devices, anytime and anywhere.
Operating systems aren't a limitation when it comes to remote computing. Several applications are available for almost every operating system that allow you to set up a VNC server on your computer.
source https://www.makeuseof.com/install-ubuntu-vnc-server-linux/
Post a Comment for "How to Install and Run a VNC Server on Ubuntu Linux"
Comment when there are difficulties