How to Create a Collaborative Inbox in G Suite
When your team needs to manage the same incoming emails, you can use Collaborative Inbox from G Suite for adding multiple users to the same account. The function allows multiple team members to maintain the same inbox simultaneously.
Here's how to create your own Collaborative Inbox, use all the features, assign team members, and grant specific permissions all from your G Suite account.
What Is a Collaborative Inbox in G Suite
The collaborative inbox in G Suite allows a group of individuals to access, maintain, and manage the same email inbox. This can be helpful for companies and organizations who need their entire marketing or sales team to answer similar emails.
It's a great way to increase productivity by encouraging online teamwork collaboration through Google tools to create an efficient workflow.
As an example, if your sales reps are constantly receiving emails about potential partnerships, you can assign everyone to monitor the same inbox. Anyone can respond and manage the emails that come in.
You can also set up a Collaborative Inbox if you work at a school that receives emails from parents so that any teacher can respond to those emails. Any member who has the right permissions can claim an email for themselves or assign it to another group member.
Google Workplace is not the only collaboration tool to combine with Gmail, but it's the most efficient if you already have G Suite.
You can use this tool to tag specific emails, which helps organize your inbox and makes it easier to search for older emails. If you're selling products, tagging all emails with those specific products will help others find them.
Before you can have a Collaborative Inbox, you need to set up a Google Group and add members.
How to Create a Google Group and Add Members
To begin managing and accessing your Collaborative Inbox, you first need to create a group. This will allow you to start adding members to your Collaborative Inbox.

- Sign in to Google Groups.
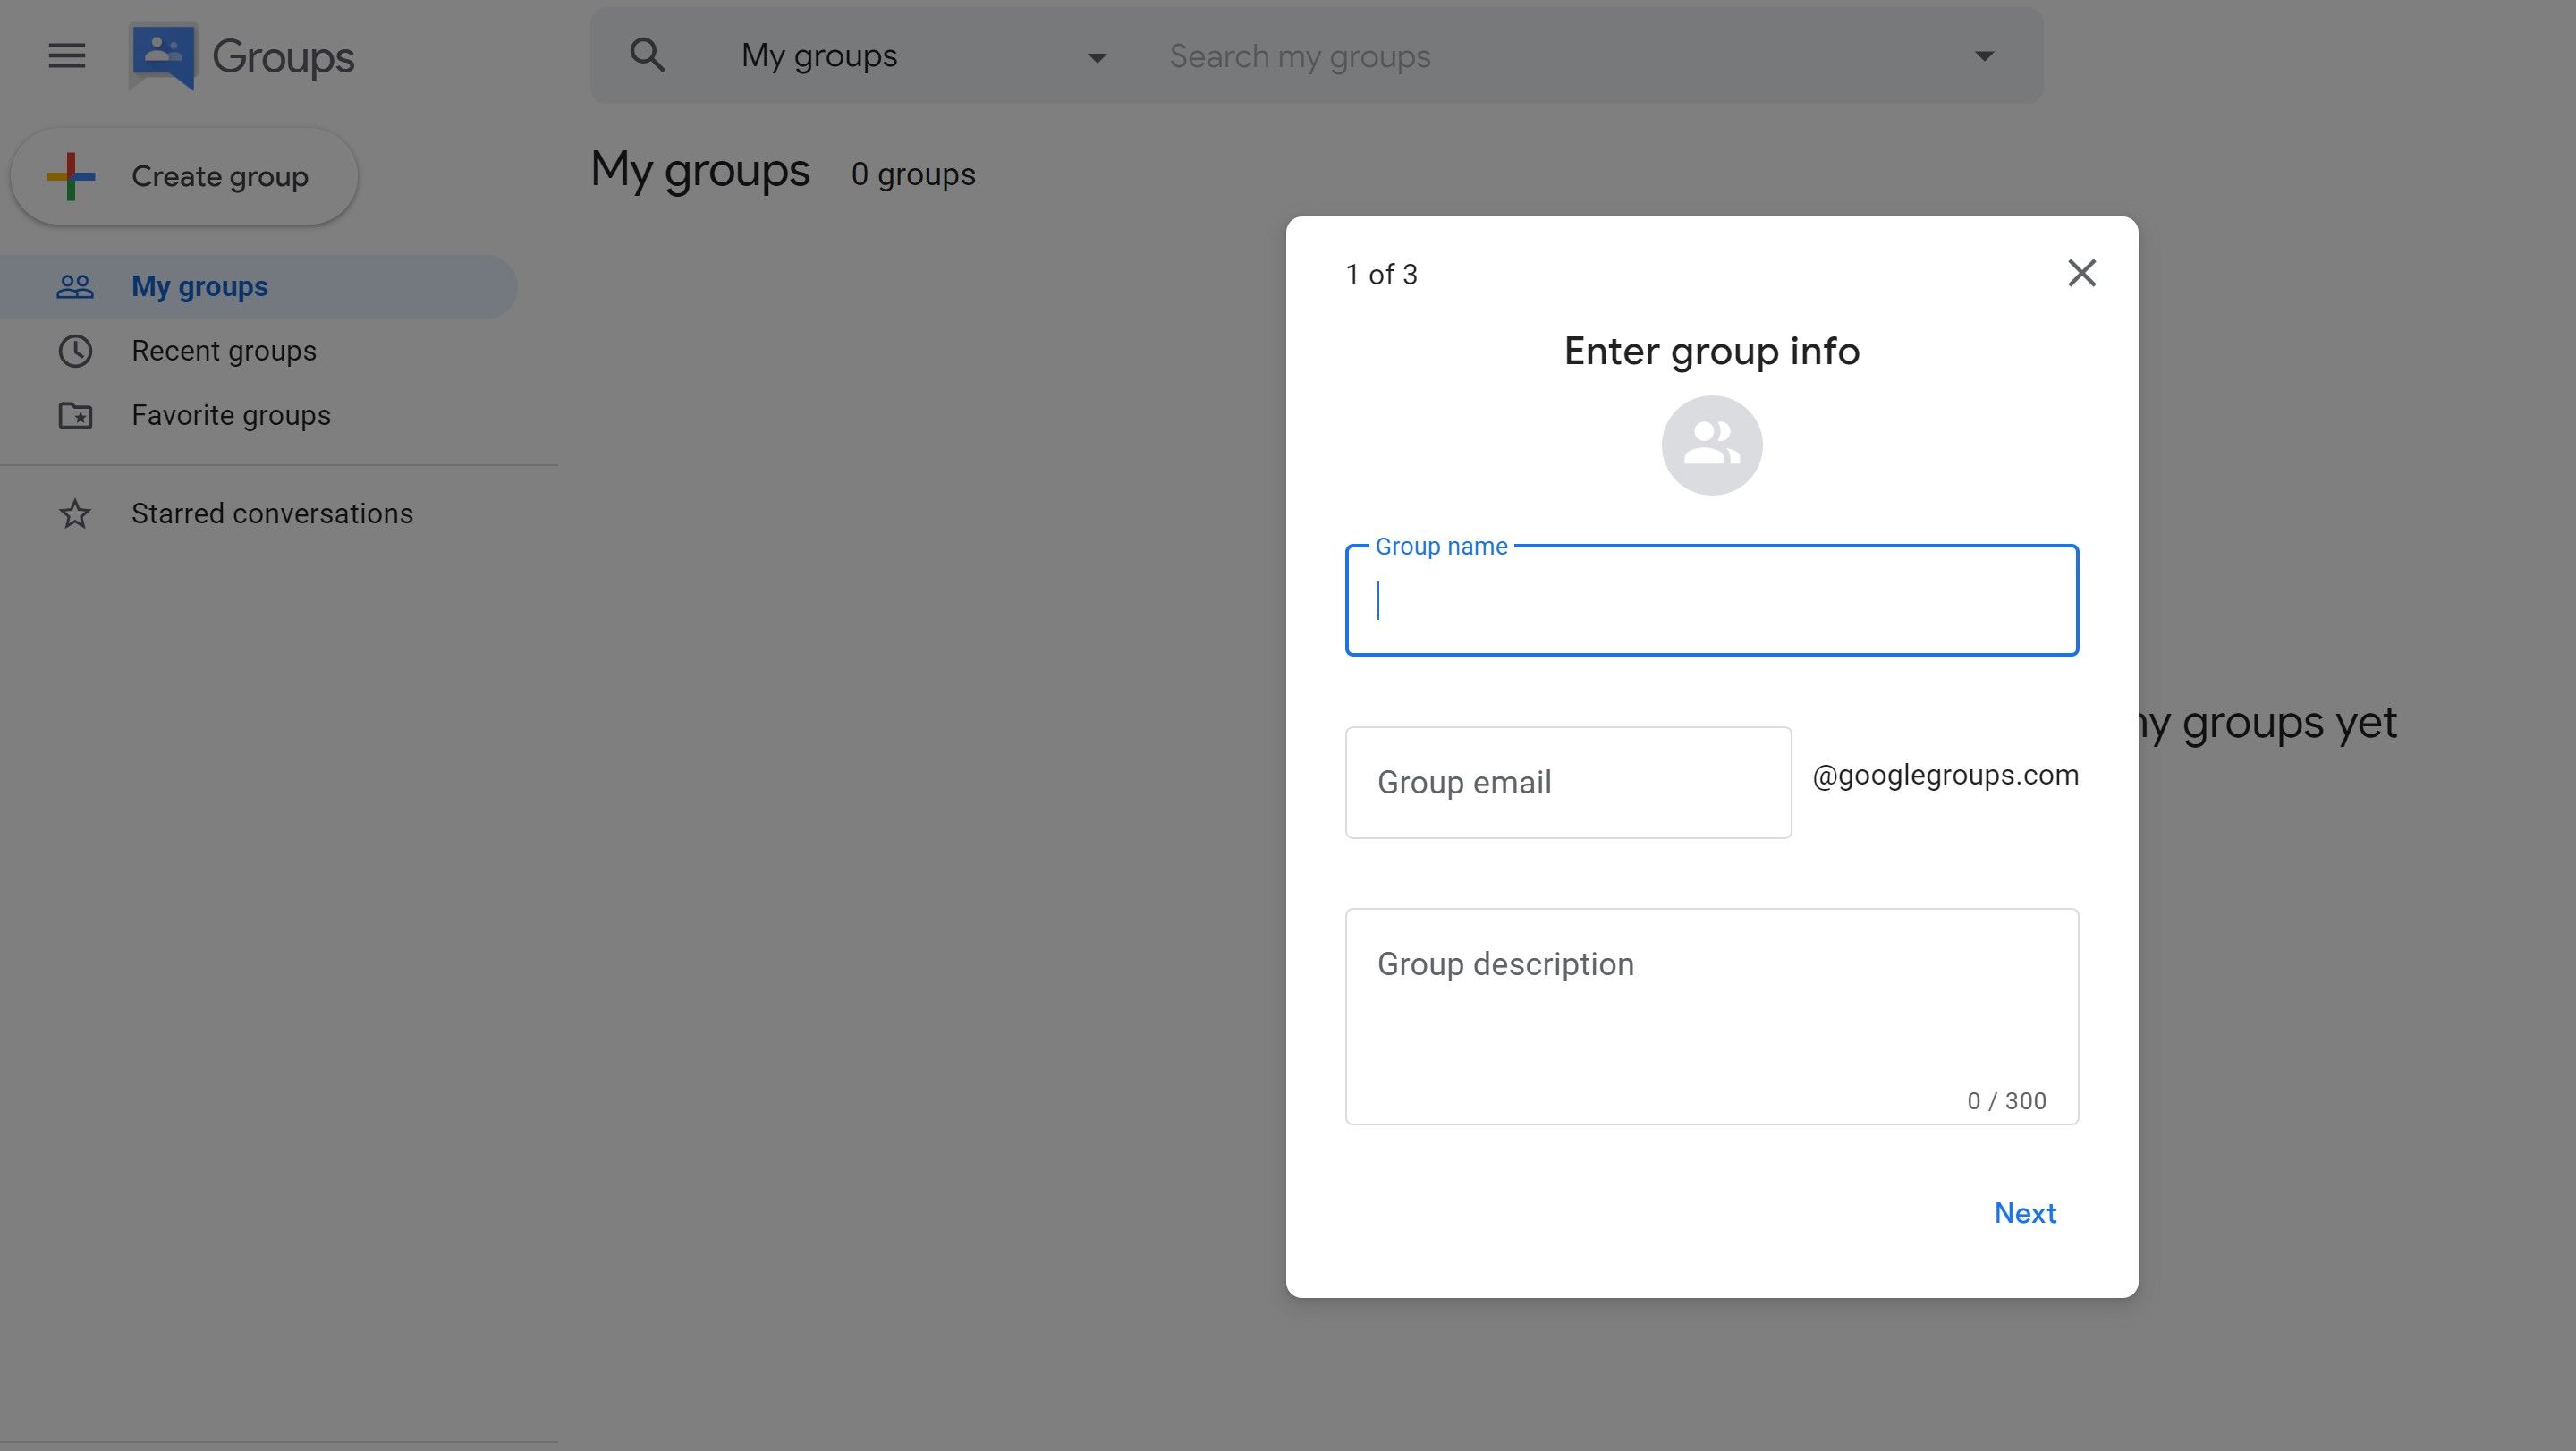
- Click Create Group.
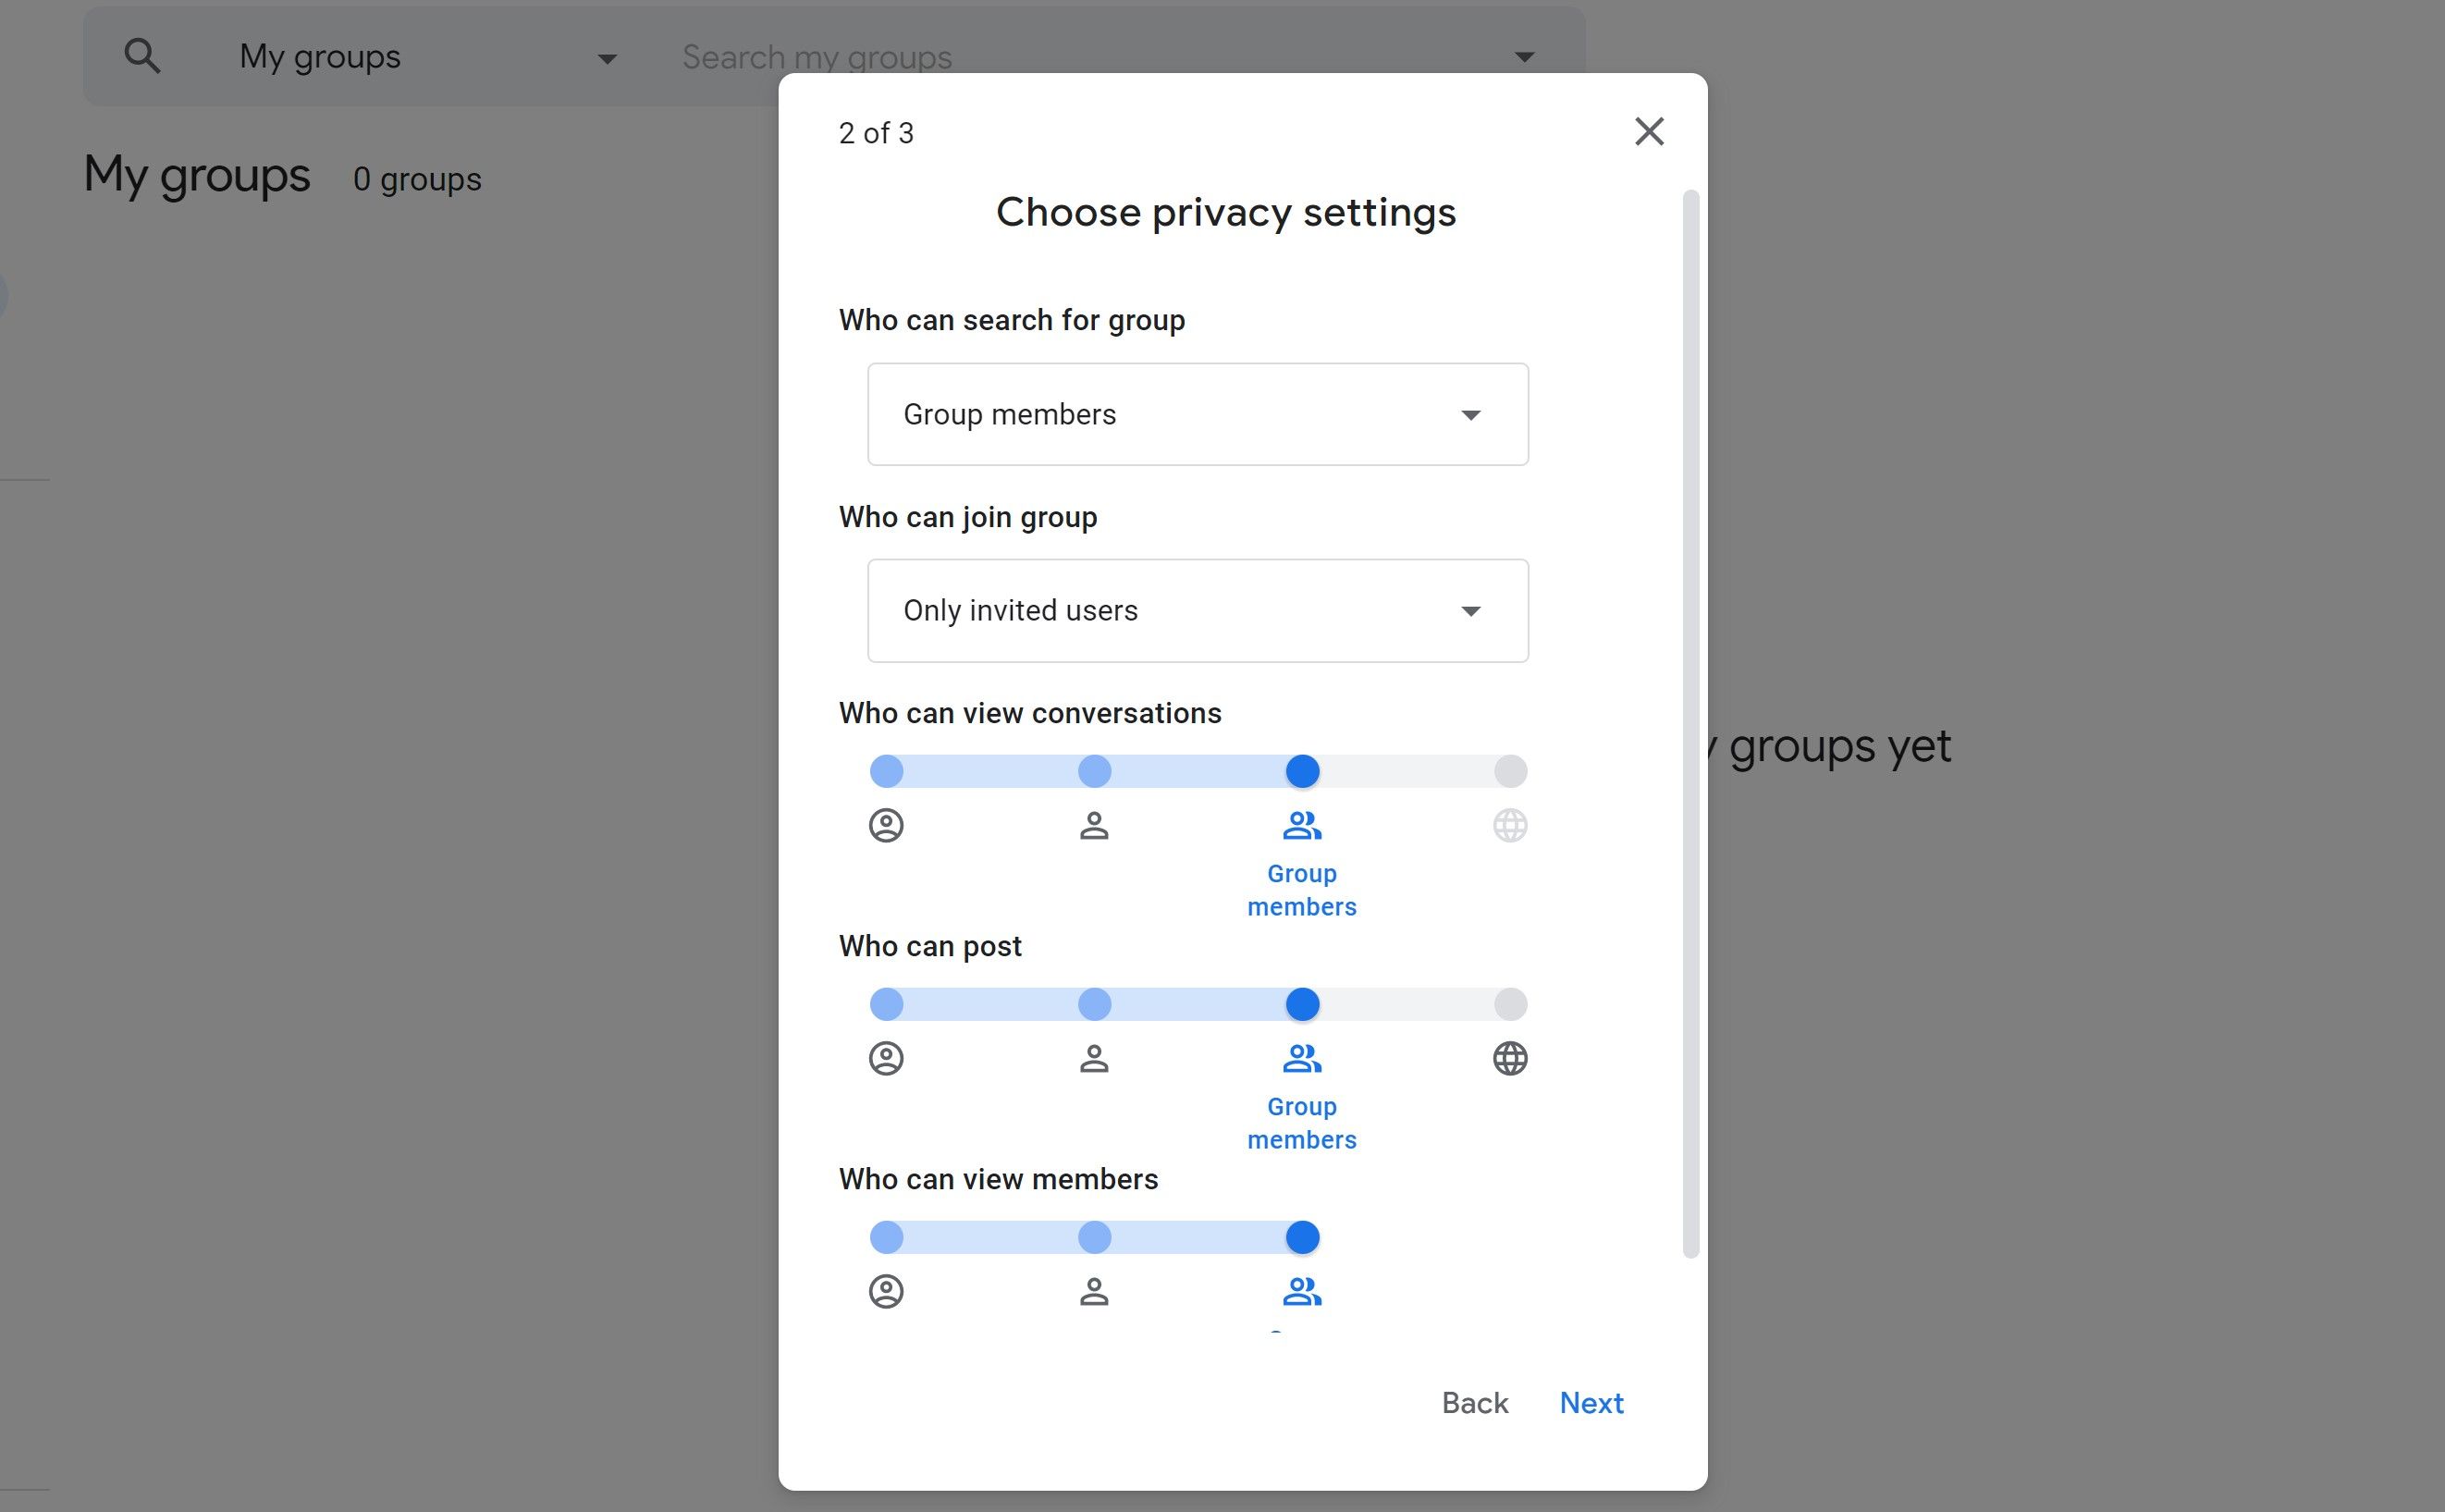
- Enter info and choose settings.
- Click Create Group.
Once you have your group set up, you can start inviting people to the group by email, adding them directly to your group, or approval of people who applied.
Sending an invitation mails it directly to the recipients' inbox to confirm they want to join the group. Directly adding a member to the group requires their email address. It will add the member after submission.
By creating your group and adding members, you will be able to have a fully functional Collaborative Inbox. The only thing holding you back is the need to turn the feature on.
How to Turn On Collaborative Features
To create a collaborative inbox for your existing members, you need to enable collaborative features first. But before you follow the steps below, make sure you have enabled conversation history for Google Groups.

- Sign in to Google Groups.
- Click the name of the group.
- Click Group Settings.
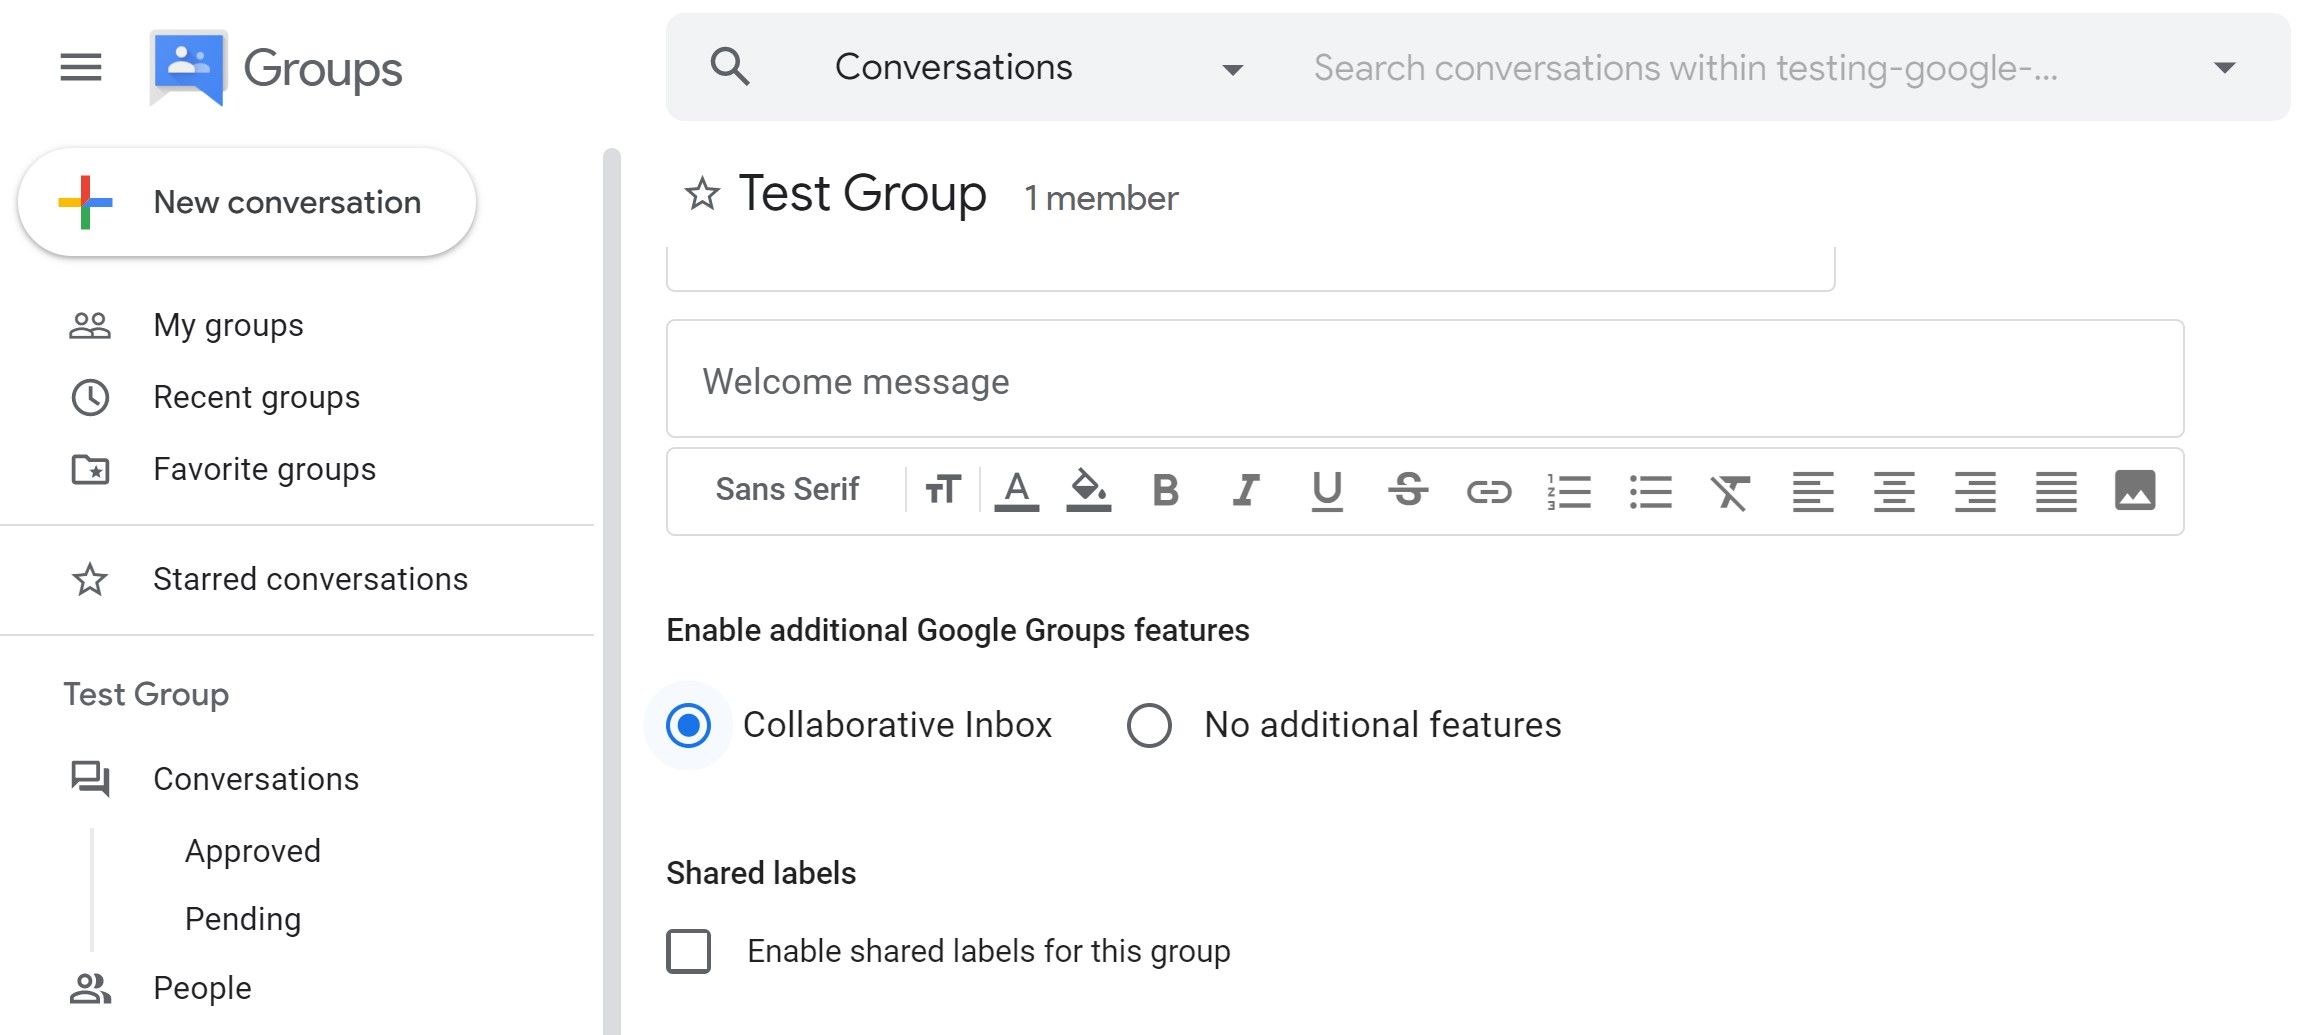
- Under Enable additional Google Group features > Select Collaborative inbox.
Once the collaborative features are all set up, you need to assign permissions to each member to make it easier for them to manage the account.
How to Assign Permissions to Collaborative Inbox Members
By assigning permissions to group members, you will enable your team to be able to take conversations, assign conversations, mark conversations as completed, mark conversations as duplicates, and mark conversations as no action needed.
You can assign different permissions to a group depending on default group roles (owners, managers, members), everyone in the organization, everyone on the web, or custom-created roles.

- Sign in to Google Groups.
- Click the name of the group.
- Click Group Settings.
- Click the toggle to Turn on permissions.
- Move the slider and select which users get the permissions.
You can also create exclusions in your permissions to exclude specific members from your permission settings.
Managing Your G Suite Collaborative Inbox
A Collaborative Inbox allows you to assign different members to a group and give them specific permissions so they can manage your email effectively.
Each team member will have access to the entire inbox and can assign different conversations to different members. Now that your team has been created, you need to think about keeping everyone in the account secure.
source https://www.makeuseof.com/create-collaborative-inbox-in-g-suite/
Post a Comment for "How to Create a Collaborative Inbox in G Suite"
Comment when there are difficulties