How to Use the Project Manager in Adobe Premiere Pro
Working on complex editing projects often requires Premiere Pro to source material from multiple media sources.
It doesn't bear thinking about if material is lost for a project you're asked to return to months later after delivery. As such, it's vital that you know how to properly secure your project, and its assets.
To achieve this, the Premiere Pro Project Manager is a versatile tool that will let you migrate your project to different locations and back up all your used assets safely.
So, let's jump in and learn how to use the Project Manager in Premiere Pro to keep your projects organised and intact.
Getting Started
Let's set the scene. You've just finished editing a major project and your deliverables have been shipped off to the client. In the future, you want to be able to access your project without receiving the dreaded Media offline message:

It may even be that your client, as per your business agreement, wants the project for archiving. So, you need to ensure that you have a folder with everything you need to achieve your video. That includes images, video, and audio clips.
Project Manager will also back up files and settings created within Premiere Pro, such as subtitle files created with the captions tool.
Let's start by creating a folder in which our new project can be placed. Make sure it's well labelled, to keep your project and your folder structure organised.
Within Premiere Pro, hit File > Project Manager. This will open up the Project Manager in a new window, where you'll be able to set a number of parameters for your backup.
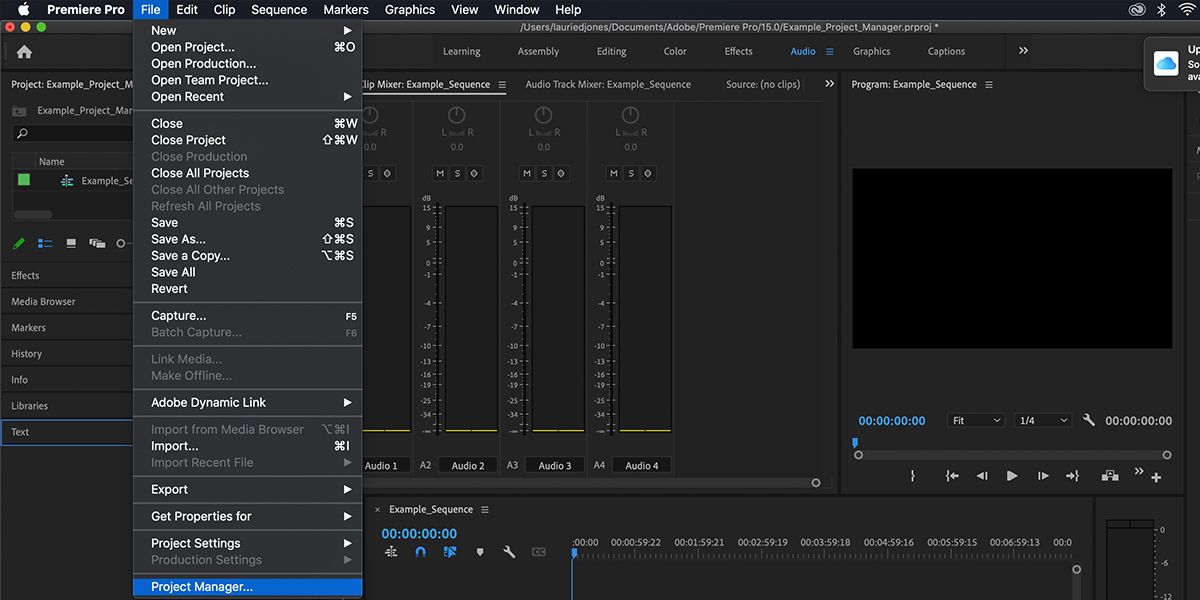
Below are the individual settings.
Sequence
This window determines which sequences Premiere Pro will look at and consolidate assets from. By default, it will pick all your sequences.
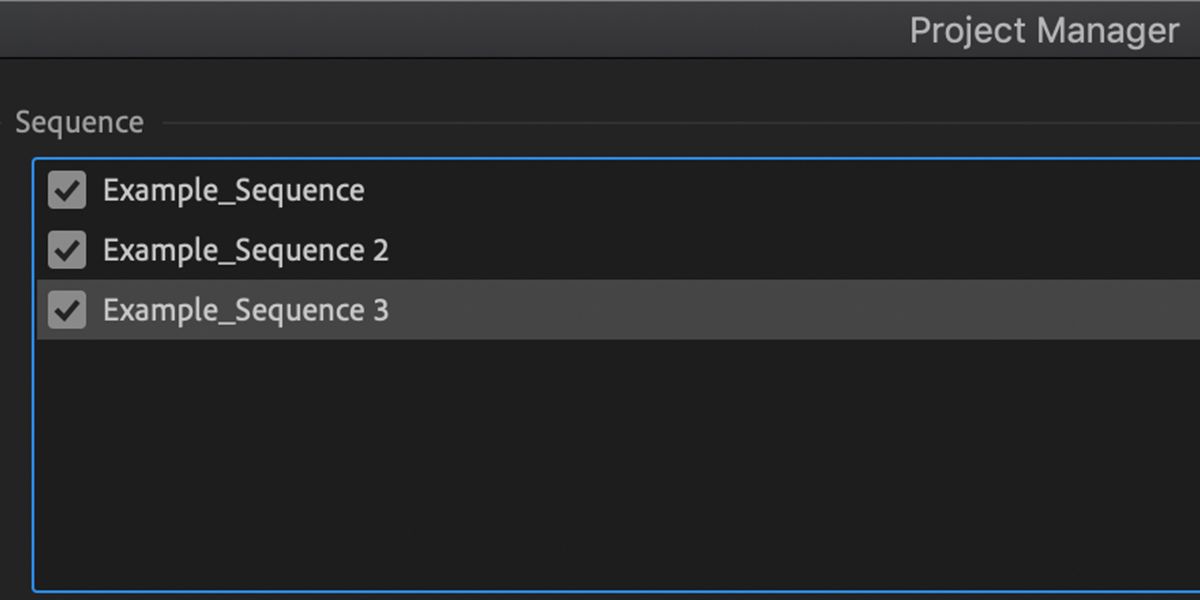
Why is this important? If you have multiple versions of sequences (for example, Edit V1, Edit V2 etc.), you may want to exclude material that didn't make the final cut to save space.
You might also have multiple versions and alternate edits that you need to decide whether to back up or remove.
Destination Path
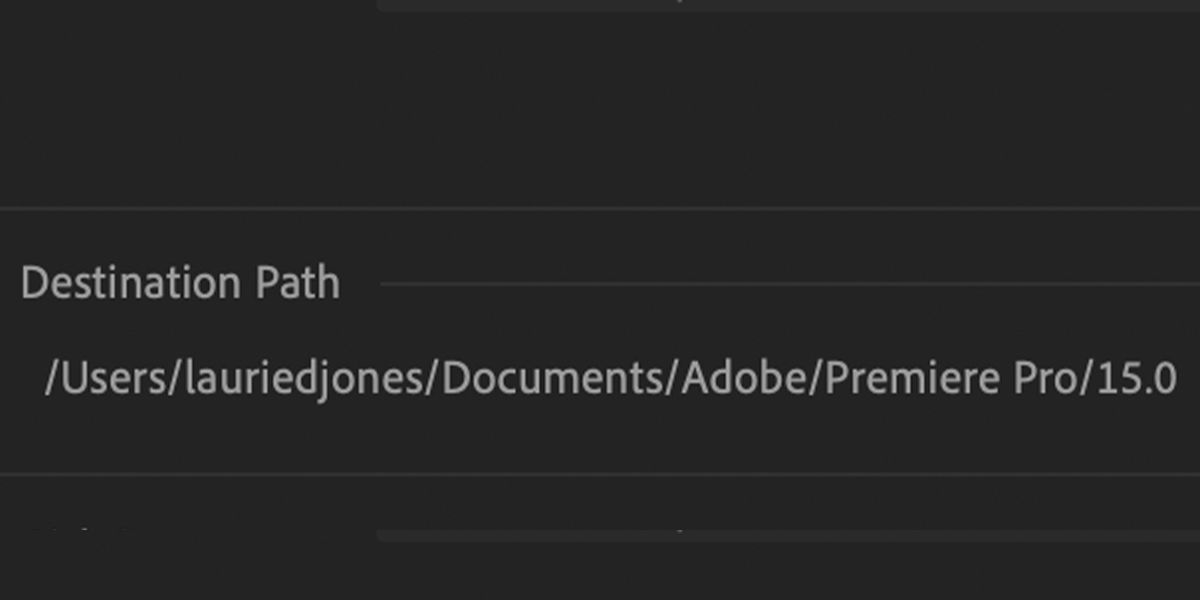
This is where your project files and all assets are stored. Set it as the folder that was created earlier.
Resulting Project
This is the most crucial setting of the Project Manager, and one that you will need to choose carefully depending on your needs. You have two choices:
- To copy all of your files to a new location
- To consolidate or transcode those files
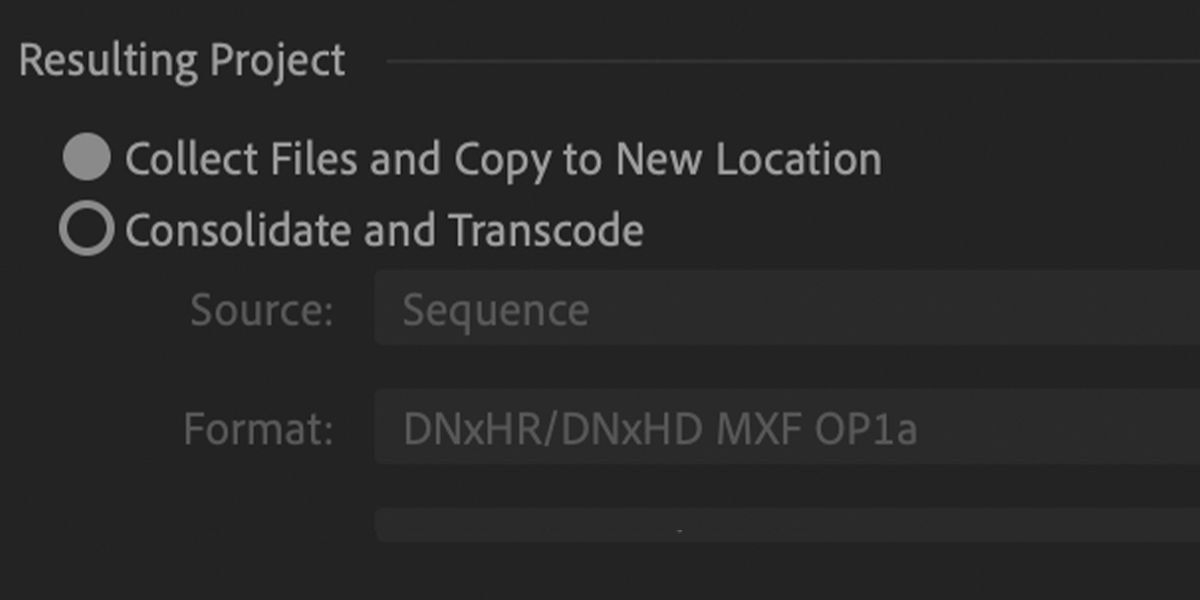
Let's run through how both of these and their additional options work.
Collect Files and Copy to New Location
This is the more self-evident of the two settings. As you can guess, this will look at all the files and assets that your Premiere Pro project uses, and copy those to the folder.
Consolidate and Transcode
Consolidating and transcoding your files is a slightly less straightforward option, but one that can open up extra options depending on what you want to do with your project.
In basic terms, all your video assets are converted to a new format that you can choose.
Why do this? If you are using particularly large raw files from your camera in resolutions that exceed the method of viewing, you may not want to provide these to the client, due to the sheer size, and difficulty of sending online.
Choosing to convert your project's files to a smaller resolution will let you overcome these issues. It also allows you to optimize your project for archiving.
Transcode Settings
If choosing to transcode your project's assets, you will have some additional settings to work with.
The first of these is Source. This determines the format to which clips are converted.
Sequence will transcode clips to the specifications of the edit sequence. So, a 4K clip used in a HD sequence will be transcoded to HD.
Individual Clips will transcode your files to their original specification. So, a HD clip and a 4K clip used in your project will remain as HD and 4K resolution respectively.
Preset will let you set your own format and settings. Depending on your own needs and workflow, there is no right or wrong answer for which one to choose.
Additional Options
Additional options are also available. Let's look at settings which are most pertinent to the backup process.
If you are using Adobe Dynamic Link to connect an After Effects project to your Premiere project, you can specify how Project Manager will handle the connected After Effects file.
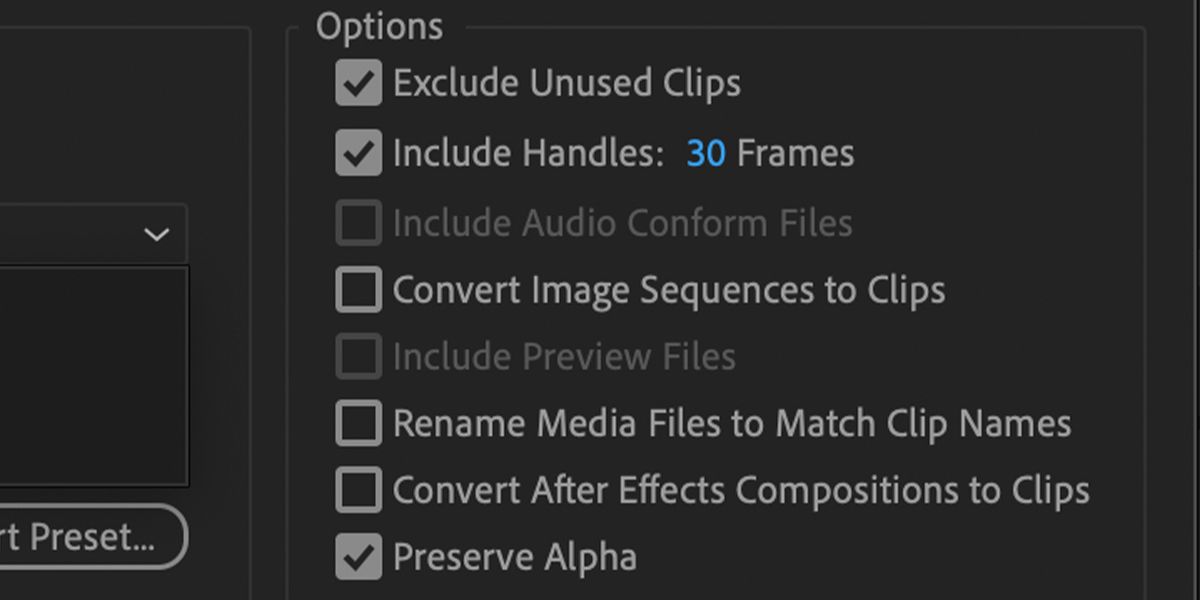
Exclude Unused Clips
This does what it says on the tin. Enabling it will prevent clips or assets that are not used in your sequences from being copied over.
Include Handles
Adding handles allows you to dictate how much of your clips used in your sequences are transcoded. No handles (0 frames) will only give you the duration of the clip used in your edit. 200 frames of handles on a 25 frames per second sequence would give you eight seconds of extra clip on either side (if long enough).
Rename Media Clips to Clip Names
Toggling this will rename your raw footage file's name to the name of the clip in Premiere, if you have renamed it via sub clipping or nesting.
If you are using After Effects sequences in your edit, via dynamic link (as covered previously here), then you can specify whether you would like these to be converted to footage or copy the source After Effects file. This is achieved with Convert After Effects Compositions To Clips.
Preserve Alpha
Checking this will ensure that files with alpha channels retain their transparency.
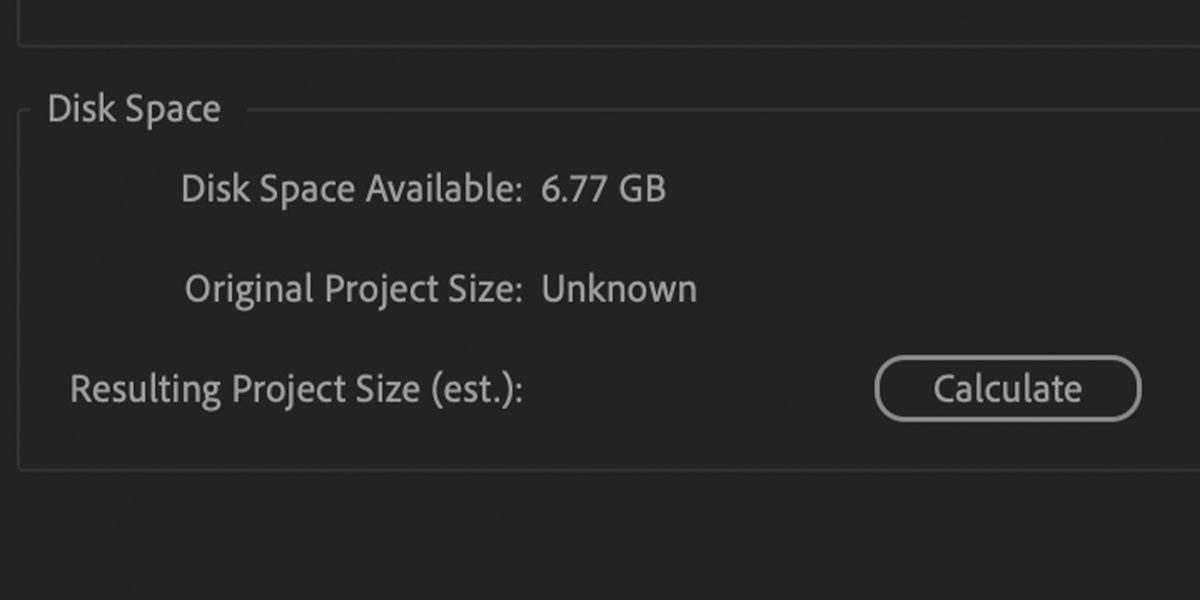
Checking Your Backup Size
One you have set your settings, you can use the Disk Space box to determine how large your project is. This is particularly useful if you need to get a project backup under a certain size for storage.
Once you are all set, hit OK. Premiere Pro will then start migrating your project, footage and assets, converting your files if specified.
Next Steps
And there you have it!
When finished, you will have a folder containing everything you need to back up or migrate your Premiere Pro project.
Improving your workflows and keeping your project tidy before backing up is also a good idea.
source https://www.makeuseof.com/how-to-use-premiere-pro-project-manager/
Post a Comment for "How to Use the Project Manager in Adobe Premiere Pro"
Comment when there are difficulties