How to Edit Videos With Pancake Timelines in Premiere Pro
Time is money. When bogged down by an inefficient workflow in Premiere Pro, you leave cold, hard, legal tender all over the cutting room floor.
Some editors discount the power of technique when optimizing themselves for efficiency, opting instead for crazy gadgets and third-party plugins that don't address the problems that really slow them down.
Visibility, convenience, and agility—pancake editing in Premiere Pro bring all three to the table, allowing you to work quickly, even on a cramped laptop display.
What Is Pancake Editing in Premiere Pro?
Normally, when editing in Premiere Pro, you use a single timeline. This is aided by the Source monitor that shows you the clip selected in the active bin, and the Program monitor, which serves as your window into your active timeline.
Most traditional editors will employ the use of something called three-point editing. A segment of footage from one of your bins is delineated in the Source monitor with an in and out point. From there, the selection is translated to the timeline with another in or out point that shows the program where you would like it to go.
Now, a second timeline enters the fray. Recall the way that a pile of pancakes stacks up on your plate. The proximity of the neighboring timelines makes moving footage from one to another much easier and faster.

Flattening two timelines to collectively match the height of the default, and putting one on top of the other may feel silly at first. After all, it looks a bit more like using building blocks than the more classical technique described previously.
But once you start, you really won't ever want to go back. Who would have thought that unleashing one's inner child would ever be so useful?
Setting Up Pancake Timelines in Premiere Pro

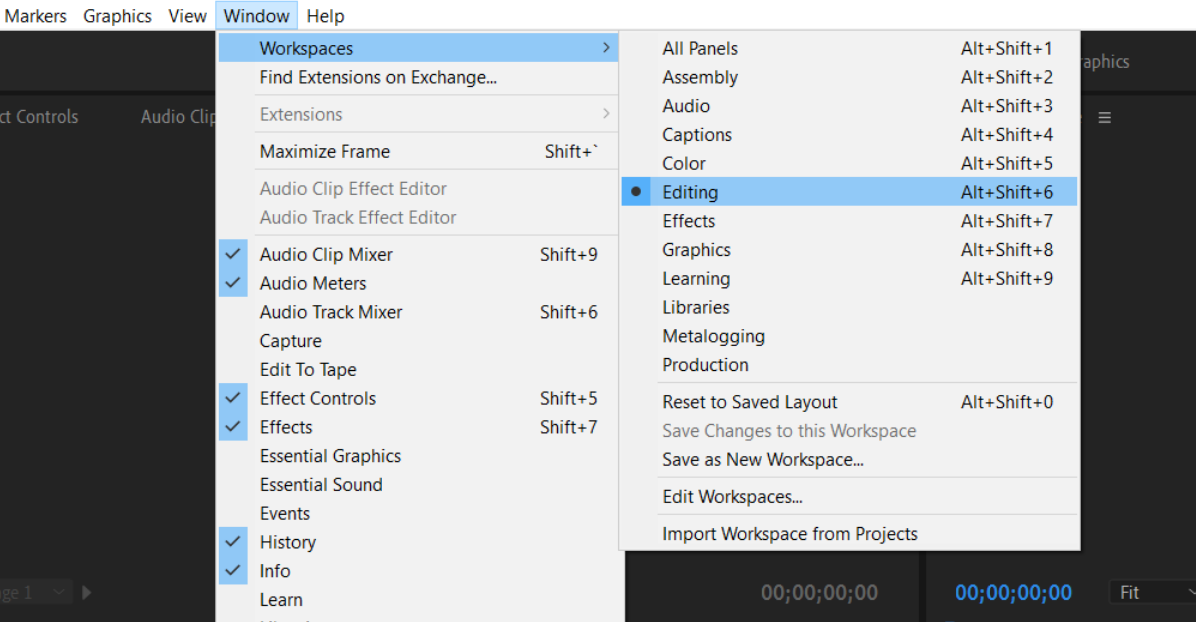
We recommend starting with the default editing workspace. Reset the layout with the Window dropdown, navigate to Workspaces, and select Editing. This will arrange everything to match the factory default.
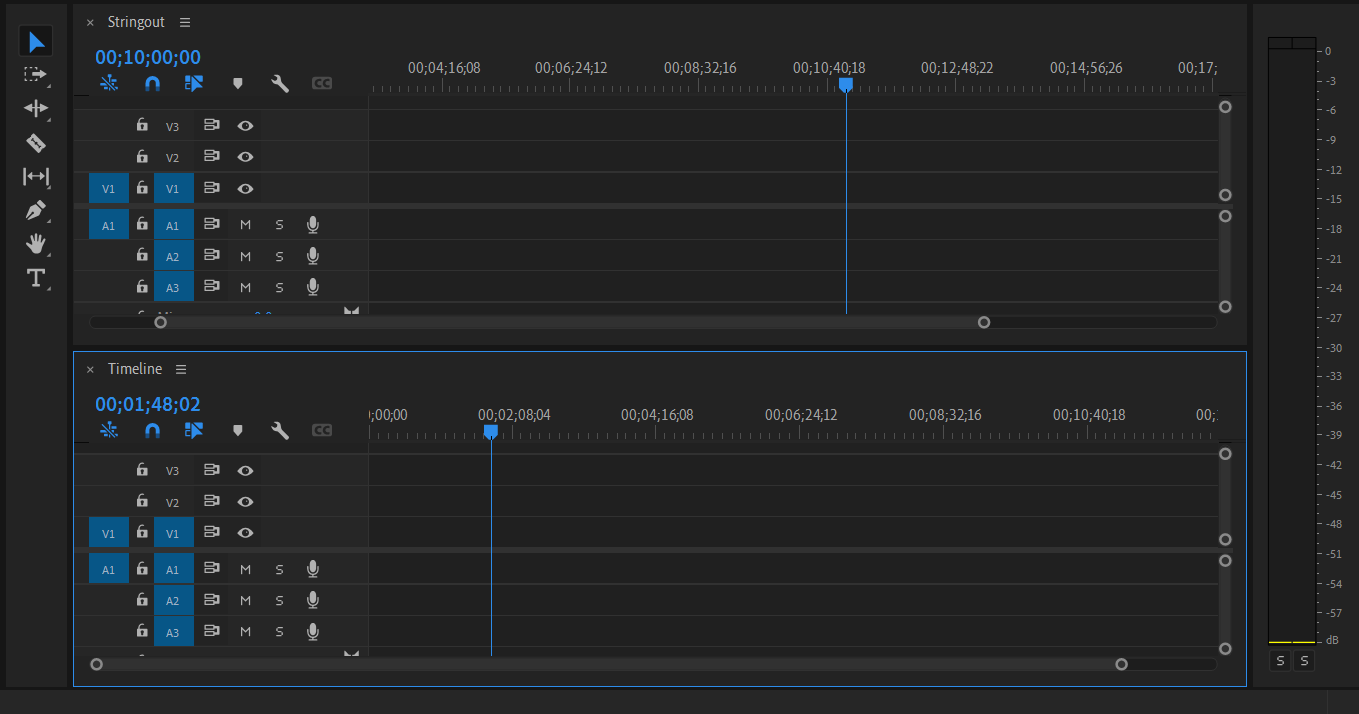
Before shoving everything around, you'll need to create two timelines: a stringout, and the timeline that you will be building your final sequence in.
What Is a Stringout?
Before the advent of non-linear editing software, editors were literally working with a roll of continuous, uninterrupted, physical footage on a steel reel. Breaking it down involved hours on a flatbed, painstakingly scouring every inch for what the director was after.
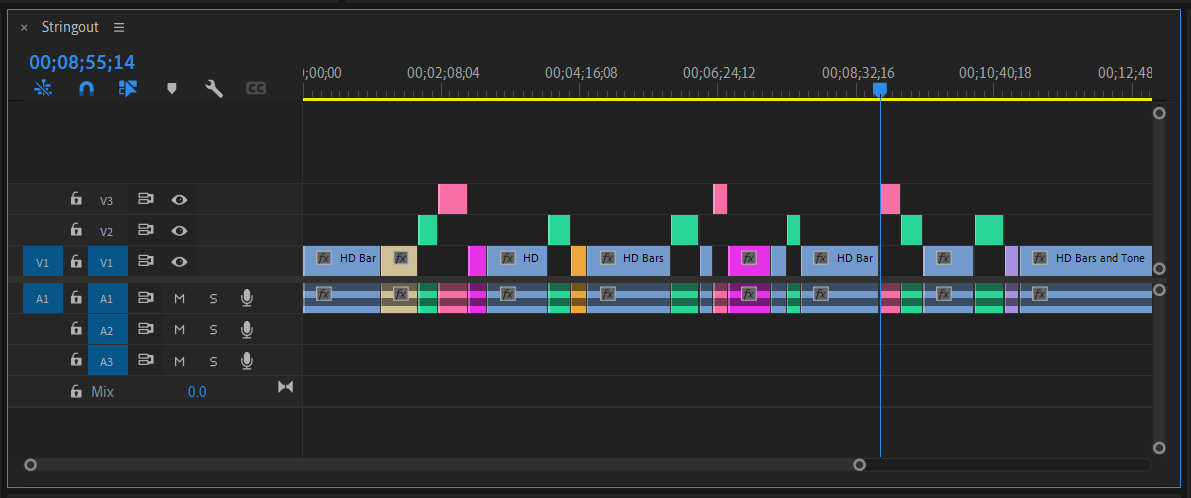
Digital editing allows us to skip over much of what we acquire on set, but at great creative cost. The stringout is meant to simulate the editorial experience of yesteryear. Instead of hunting and pecking, we pull every second into a single sequence, laying the entire project out from front to back. This timeline will be the pancake that sits on top of your "stack."
The stringout frees you from the bin system, giving you space to scrub individual shots without losing sight of the rest of your material. There are best practices in Premiere Pro that will help you map this sequence out, making it more navigable. More on that in a minute. For now, just dump all of the LEGOs out onto the floor.
Using Pancake Timelines in Premiere Pro
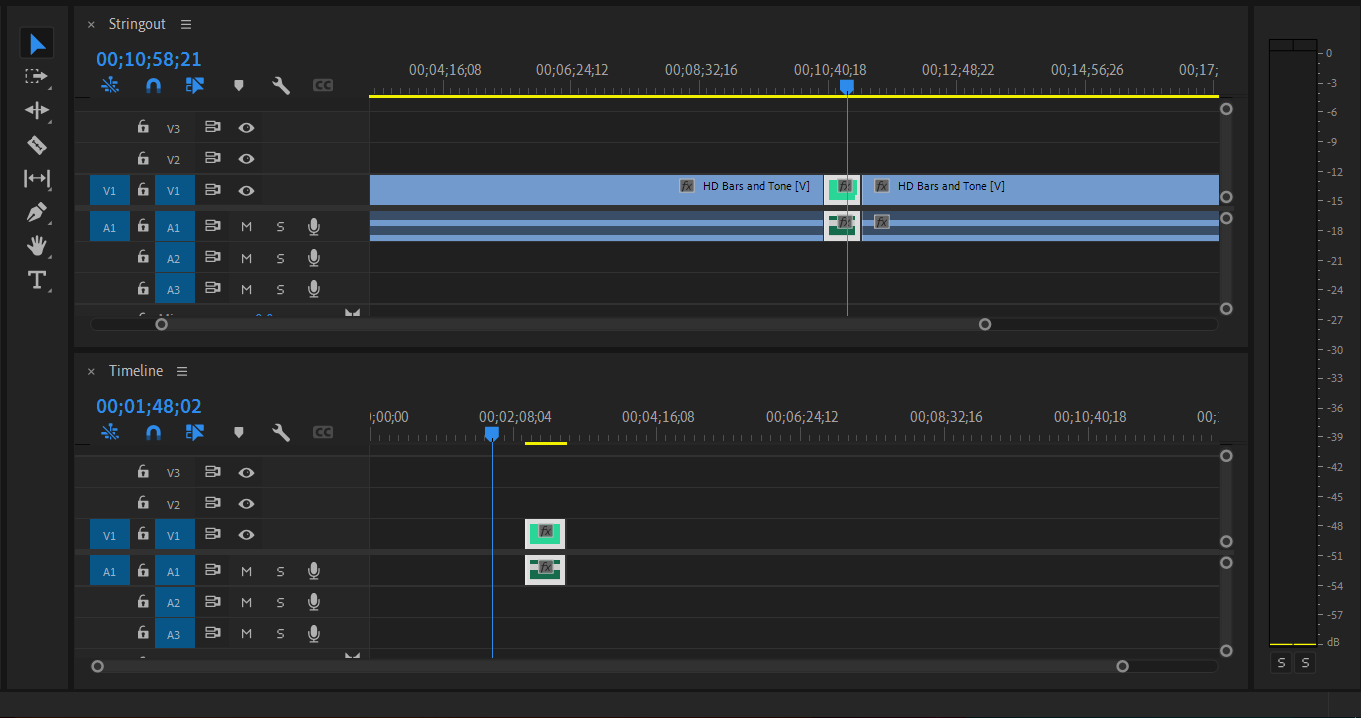
Next, create an ordinary sequence, the same as you would in a normal sense. Pull it out into a window and stick it right under the stringout already in front of you. From here, you will be able to hop between both without opening and closing either one every single time you need something.

Your Program monitor will display whichever sequence that you have selected at the playhead. Dive right into the stringout above and start pulling selects—once you have a rough idea of what you would like to include, you can start yanking them down into the sequence below.
Tips for an Efficient Pancake Editing Workflow in Premiere Pro
If your project is large, you're probably looking at a very long stringout sequence. Those with experience as an assistant will have a good idea about how to proceed. It's all about staying organized in Premiere Pro from the start.
Log and Mark Your Stringout
Logging footage involves breaking it down by what each file contains. This often includes some technical description (such as scene number and take, for example) that allows the editor to quickly pull everything that he or she needs for a planned part of the final product.
This will usually come in the form of metadata attached to the footage in the program; Premiere Pro indexes everything that you add to the descriptions, allowing you to search for specific shots through the bins. You can link this feature to the timeline directly by using marks as chapter "bookmarks," utilizing them fully through the Markers panel.
Use Color Labels
As appealing as Premiere Pro's default iris is, losing one's place becomes all that much easier when you fail to give yourself some sort of chromatic landmark to grab ahold of as you work.

We find that assigning all of your go-to color labels to hotkeys speeds up the process significantly. You chop it up, apply the color label, and work through the slough steadily until everything has been assigned some sort of status—use it, lose it, or throw it into the maybe pile.
Audition Everything
With the world wide open before you, there is no reason not to try every possible combination available at your fingertips. What we value most about a pancake workflow is the flexibility that it gives the editor, doubly so when he or she was not on set for the mayhem that transpired.
Some of the most iconic scenes in film history happened by accident. If you don't try, you'll never know.
Improve Your Productivity in Premiere Pro
If your editorial aspirations are being suffocated under the avalanche of footage on your desktop, we've got your back. For that hot-off-the-griddle sizzle, nothing beats pancake editing for a more professional final product, every single time.
source https://www.makeuseof.com/how-to-create-pancake-timelines-premiere-pro/
Post a Comment for "How to Edit Videos With Pancake Timelines in Premiere Pro"
Comment when there are difficulties